Configure
Click the Configure button to configure the selected devices. If multiple devices are selected, certain configuration options will not be available and greyed out; for example, the Device Name. There are tabs available for configuring Settings, Time Settings, and Authentication.
Settings
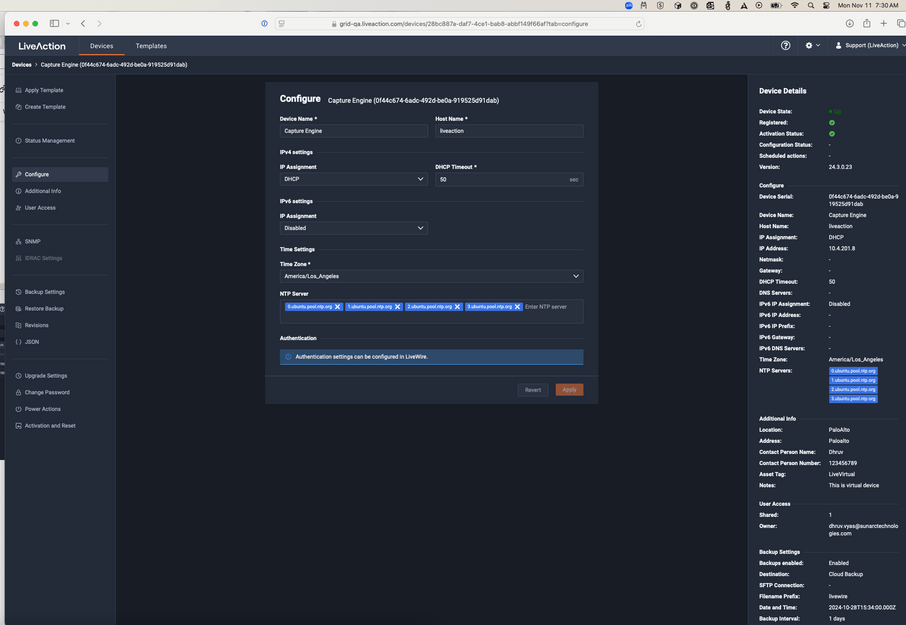
◦ Device Name: Displays the unique name given to the device. Type a new name to change the name.
◦ Host Name: Displays the host name of the device used by DNS.
◦ Location: Displays the general location of the device. Type a new location to change the location. We suggest entering the physical location of the device for the organization. For example, ‘Office.’
◦ Address: Displays the mailing address of the device. For example, 123 Main St., New York, NY.
◦ End of Life Date: Displays the date when the device should be replaced.
◦ Asset Tag: Displays the asset tag of the device. Type the asset tag to change it.
◦ Notes: Type any notes to add to the device you are configuring.
◦ IP Assignment: Displays the current IP assignment for the device. You can select either DHCP or Static. If the IP Assignment is DHCP, then the IP assignment is configured automatically via the DHCP server. If the IP Assignment is Static, then the options below are available:
IMPORTANT: LiveWire is pre-configured to obtain an IP address automatically from a DHCP server; however, we strongly recommend the use of a static IP address for LiveWire. If DHCP is selected as the IP Assignment, and if the address should change on a new DHCP lease, then you must look up the new IP address assigned to LiveWire.
NOTE: If DHCP is selected, you have approximately two minutes to connect LiveWire to your network in order for the DHCP server to assign an IP address. If an IP address is not assigned to LiveWire by the DHCP server within two minutes of being connected to the network, LiveWire defaults to a static address of 192.168.1.21. Please make sure LiveWire is connected to your network within the two minute time period from the time you click Apply. If you reboot LiveWire, the two minute clock is also reset.
◦ Address: Displays the IP address assigned to the device. Type a new address to change the IP address.
◦ Netmask: Displays the netmask address assigned to the device. A netmask address, combined with the IP address, defines the network associated with device. Type a new address to change the netmask address.
◦ Gateway: Displays the gateway address, also known as ‘default gateway,’ assigned to the device. When the device does not have an IP route for the destination, the IP packet is sent to this address as it does not know how to direct it locally. Only a single default gateway can be defined. Type a new address to change the gateway address.
◦ DNS: Enter the address of any DNS (Domain Name Server) servers to add to the configuration. A Domain Name Server translates domain names (e.g., http://www.liveaction.com ) into an IP address. To add a DNS server, enter the address of the server, and click Add Server. Multiple DNS name servers can be defined. You can also edit or delete any defined DNS servers.
◦ Add Server: Click to add the DNS server to the configuration.
◦ DNS Servers: Displays the DNS servers added to the configuration.
◦ Edit DNS: Click to edit or update the DNS server in the configuration.
◦ Delete DNS: Click to delete the DNS server from the configuration.
◦ DHCP Timeout: Displays the amount of time (in seconds) the device will wait for a DHCP address.
Time Settings
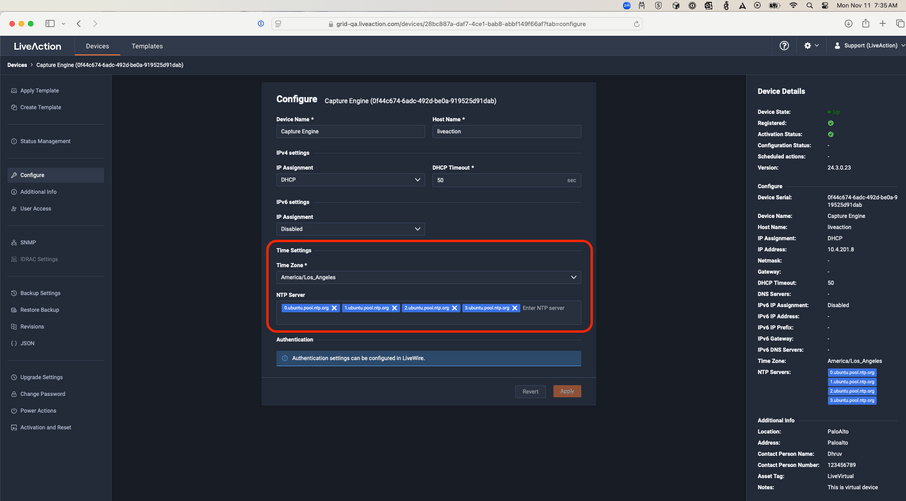
◦ Time Zone: Displays the time zone of the device. Select a different time zone to change the time zone.
◦ NTP Server: Enter the address of any NTP servers to add to the configuration, and then click Add Server.
◦ NTP Servers: Displays the list of NTP servers added to Time Settings. You can click the Edit icon to edit an NTP server in the list, or click the Trash icon to remove an NTP server from the list.
Authentication
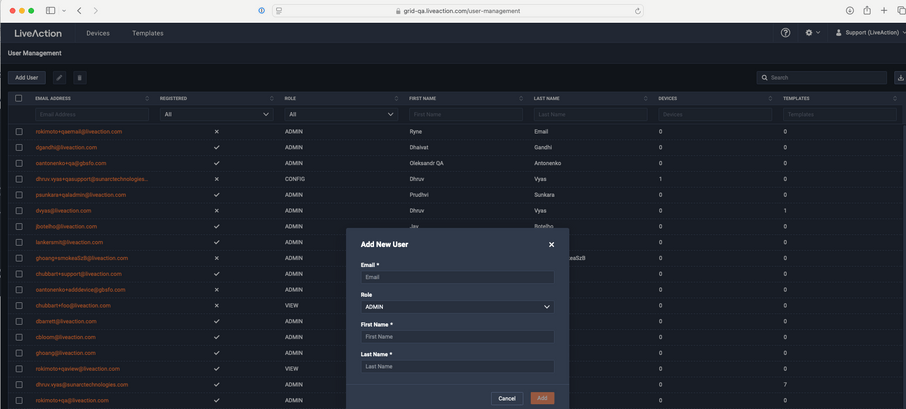
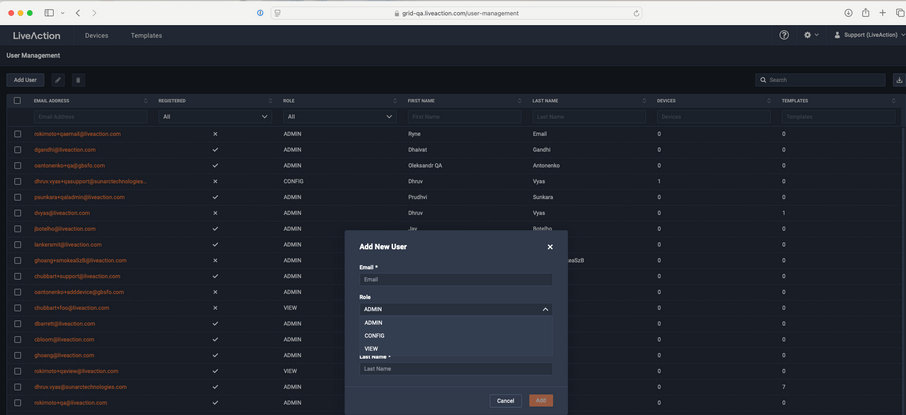
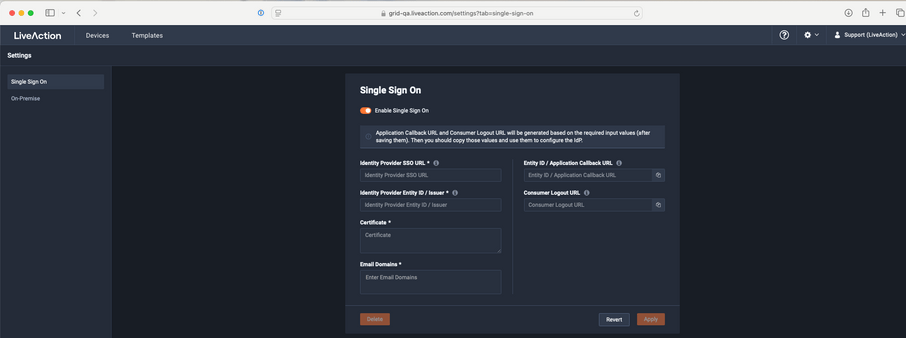
Grid supports adding users via the portal and these users will receive a welcome email from Okta with a link to login.
Additionally, an admin user can configure SAML based SSO access by navigating to Settings (gear icon) and selecting Settings. Users can follow the instructions on screen and configure their IDP.
